
How to revitalize your old floor lamp with a fresh coat of spray paint?
This guide will walk you through the process step-by-step, turning a dull piece into a vibrant part of your home décor.
Learn how to choose the right paint, prepare the lamp, and apply the paint for a flawless finish.
let's dive in.
What You'll Need
Materials List
- Spray Paint: Depending on the number of coats and the size of the lamp, one or two cans may be necessary.
- Primer: A can of primer suited for either metal or wood, based on your lamp's material.
- Sandpaper: Medium to fine grit for smoothing out the surface.
- Tack Cloth: To wipe down the lamp after sanding.
- Protective Gear: Gloves, masks, and goggles to safeguard against fumes and debris.
- Drop Cloths: To protect the surrounding area from paint splatters.
Choosing the Right Spray Paint
- For Metal Lamps: Opt for a spray paint specifically formulated for metal.
- For Wooden Lamps: Choose a paint that works well on wood, which will often be labeled as such. These paints usually soak into the wood to provide a smoother finish.
For those looking to add a new lamp to their collection before starting a painting project, check out our selection of stylish floor lamps suited for any decor style.
Complete Guide to Spray Painting Your Floor Lamp
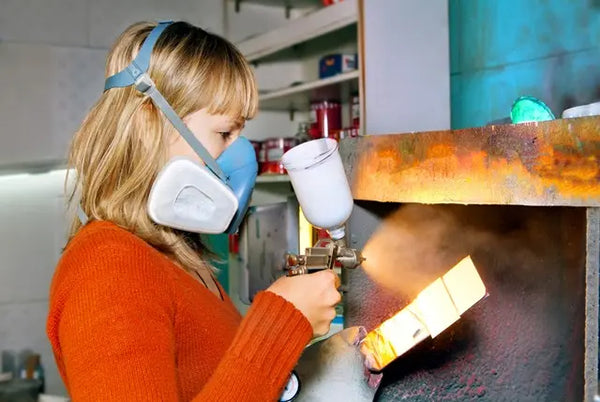
Step 1: Safety First
Before beginning your project, it is crucial to wear safety gear. Masks, gloves, and goggles will protect you from inhaling fumes and from paint particles.
Step 2: Preparing the Work Area
Choose an outdoor area or a well-ventilated space for your painting project. Lay down drop cloths to protect the surrounding surfaces and ensure that the space is free from dust and wind.
Step 3: Disassemble the Lamp
Carefully dismantle your floor lamp to expose all parts that need painting. Keep small parts and screws in a container to avoid losing them.
Step 4: Clean and Sand the Lamp
Clean the lamp with a mild detergent and water, then sand it using medium-grit sandpaper to create a surface to which primer and paint can adhere effectively. Wipe down with a tack cloth to remove dust.
Step 5: Apply Primer
Applying a suitable primer is essential for paint adhesion and durability. Use a primer formulated for metal or wood, depending on your lamp’s material. Spray evenly and allow to dry as recommended by the manufacturer.
Step 6: Spray Painting Techniques
Use smooth, even strokes while holding the spray can about 10-12 inches away from the lamp. Start spraying before the lamp and continue past it to avoid excess buildup and drips.
Expert Tip: Apply thin coats of paint and allow significant drying time between layers to prevent drips and achieve a smoother finish.
Step 7: Adding Multiple Coats
Evaluate the coverage after the first coat has dried. Apply subsequent coats if necessary, ensuring each layer is dry before applying the next. This method enhances color richness and uniformity.
Step 8: Reassembling the Lamp
Once the paint is completely dry, reassemble your lamp. Handle the pieces gently to avoid scratching the new paint. Tighten all connections without forcing them to ensure the lamp’s stability.
Additional Tips and Tricks
Choosing a Finish: Matte, Gloss, and Satin
- Matte finishes absorb light, offering a non-reflective surface that suits understated, modern decor.
- Gloss finishes reflect light, adding brightness and a sleek look, perfect for spaces that benefit from a little extra shine.
- Satin finishes strike a balance with a slight sheen that's not as shiny as gloss, ideal for achieving a soft glow.
Fixing Common Issues: Drips, Runs, and Bubbles
Spray painting can sometimes lead to imperfections, but they can be managed with the right techniques:
-
To prevent drips and runs, keep the spray can moving in a smooth, swift motion and maintain a consistent distance from the surface. Apply several light coats instead of one thick coat.
- To avoid bubbles, shake the can well before use, and spray in a low-humidity environment. If bubbles form, let the paint dry completely, then sand lightly and apply another thin coat.
Caring for Your Newly Painted Lamp
Regular Cleaning: Use a soft, dry cloth to dust the lamp regularly. If needed, lightly dampen the cloth with water to tackle any stubborn spots. Avoid using harsh chemicals or abrasive cleaners as they can strip the paint.
Avoid Direct Sunlight: Position your lamp away from direct sunlight, which can cause the paint to fade or discolor over time. Optimal placement involves areas with diffused or indirect light.
Touch-Up Strategy: Keep a small amount of the paint used on hand for quick touch-ups. If you notice small chips or scratches, cover them up promptly to prevent further damage and maintain the lamp’s appearance.
Before You Leave
Please share your results or any tips you have in the comments below—we'd love to hear how your spray paint project turned out!
For more expert tips and resources on maintaining your newly painted floor lamp, visit our comprehensive floor lamp guide.
Further Reading
How to Paint a Floor Lamp Easily: Comprehensive Guide
Leave a comment